| File Name | AX HyperBoost ULTIMATE |
|---|---|
| Size | 16.3MB |
| version | 2.1 EXTREME FPS |
| Category | AxManager Plugin |
| Android requirement | + 6.0 |
| Published By | Willy Gailo |
| Credit | Willy Gailo |
| Install Via | AxManager |
Get Link
How to Active AxManager?
To use AxManager, you’ll need to enable Developer Options on your device:
- Turn on Wifi
- Go to Settings > About Phone.
- Tap Build Number seven times to unlock Developer Options.
- Open the AxManager, Click “Need To Active”.
- Enable Notification & Click Start Button.
- Click Wireless debugging & Enable Wireless debugging.
- Click Pair device with pairing code.
- Click on “Enter Pairing Code” above and paste the WiFi pairing codes there.
How to Install This Plugin?
- Active AxManager: First, you need to make sure it is active.
- Open the AxManage:
- Tap on the “Plugin” section.
- Click “Install from Storage” and locate the geted file.
- Confirm the installation..
- Reboot Your Device After installation.
Are you tired of having a $1500 smartphone with a 120Hz screen, and playing a game only at 60 FPS? That is like trying to drive a Ferrari in a school zone, its complete waste. Everyone thinks you have to root and brick your phone in order to change the limitations set forth by the OEM. However, I have had the chance to play around with the AX HyperBoost ULTIMATE Module through AxManager, and have some pretty interesting results.
I was skeptical about trying out this No-Root app, thinking it was just another battery draining program for the hype. I was surprised when I actually saw the tool communicating with the hardware of my device and the effect was almost instantaneous: my phone finally stopped lagging and took my input as it was meant to be given.
Why This Module Hits Different
So the FPS Unlock System is probably the new headline feature of the software. Rather than just guess at what your display can handle, it actually takes a read of your screen’s capabilities – whether it’s a 120Hz or 165Hz display, the idea is that the OS is no longer just given a free pass to be lazy.
Here is what you’re getting under the hood:
- 🔓 FPS Unlock System: The system will find your maximum refresh rate, then will force the display to maximum refresh possible (120/144/165Hz).
- ✅ Game Force: Helps by turning VSync and FPS limiters off.
- ✅ Precision Locking: Lock your FPS to desired values (60/90/120, etc) to control your frame times.
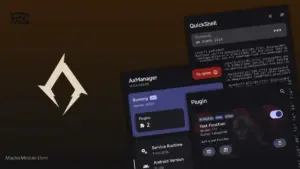
- 🎨 Enhanced WebUI: It looks amazing. We’re talking smooth anime-themed backgrounds, gradient effects, and a live performance dashboard.
- ⚡ Thermal & Power Logic: The app optimizes CPU/GPU scaling and memory management to avoid overheat issues and your phone from turning into a pocket heater.
- ✅ Network & Touch: This is intended to improve the responsiveness of your device’s touchscreen and also generally balance out network connections in an effort to lower latency for competitive players.
My Honest Take
The WebUI feels surprisingly modern. The theme really does look a lot like a modern terminal, but instead of looking broken and 20 years out of date like almost every other daemon’s web interface, it actually has relatively modern theming and a simple animations, proper charts, and doesn’t feel like it was written at a completely different time to everybody else. In a test using Resident Evil 6 and a few random other resources, I can now consistently run at 90 FPS with frames still remaining stable, and instead of “out of memory” crashes when windows get reopened.
If you want the power of a rooted Android device, but don’t want to deal with the whole “rooting” thing, then the AxManager modded device is a great alternative. This mod is not only free of any root-related compromises, but also completely clean of malware, is snappy and fast, and actually uses your device for its intended purpose.
🌐 Official Contact & Support Hub
Need help, updates, o installation assistance? Nandito lahat ng official channels — pili ka lang kung saan ka mas komportable mag-message.
📘 Facebook Page
🔗 https://www.facebook.com/share/19dBf6G5p4/
💬 Telegram Direct
🔗 https://t.me/Andi_U1
📱 WhatsApp Support
🔗 https://wa.me/qr/L4ZXYXITNQQVP1